Arduino for Beginners

T 15-20 minutes
G Hands-on microcontroller basics
L Beginner friendly

What Can You Build in 5 Minutes?

Imagine This...

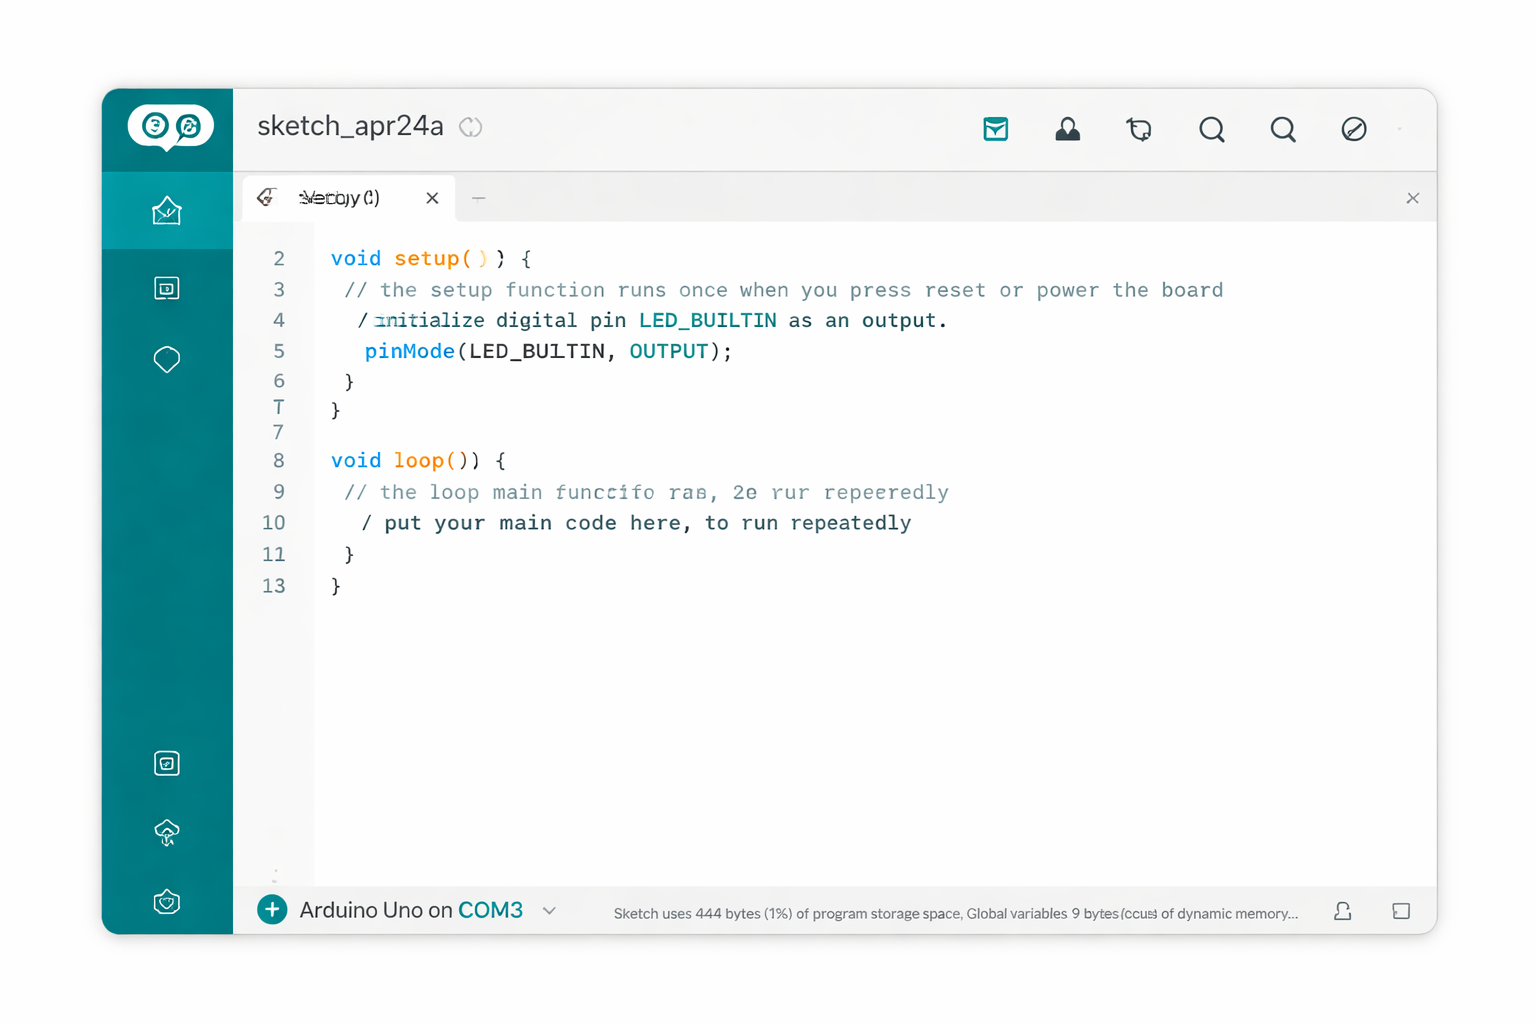
In less time than it takes to make coffee, you could write 10 lines of code that makes an LED blink. That's the power of Arduino - a tiny computer that turns your ideas into reality.

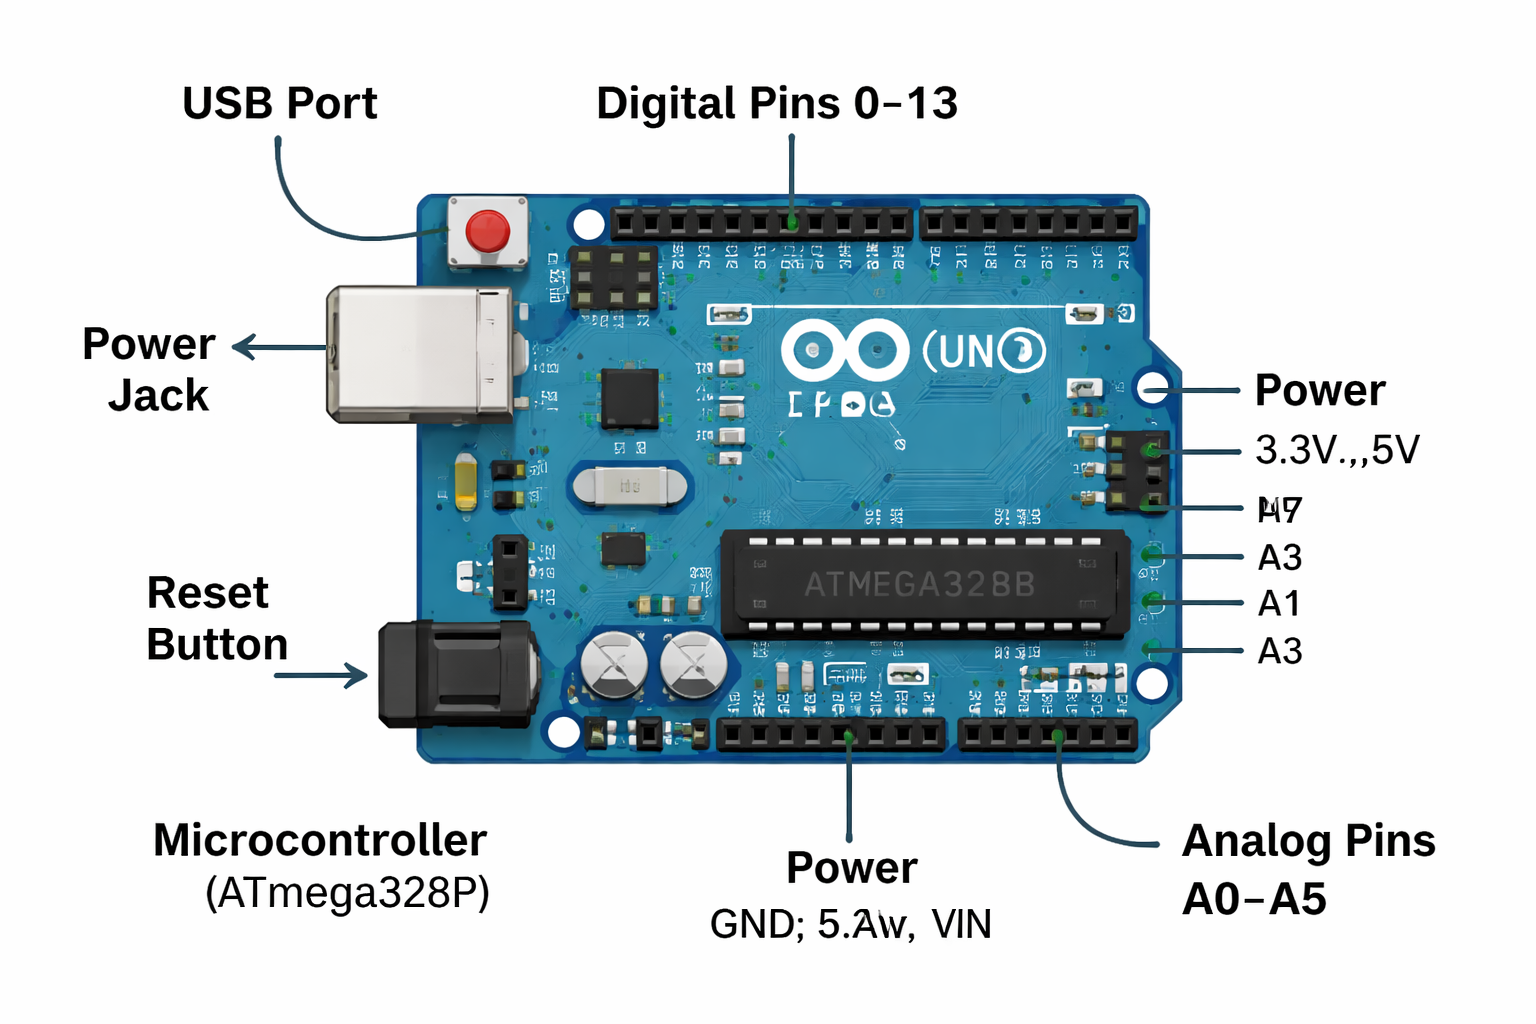
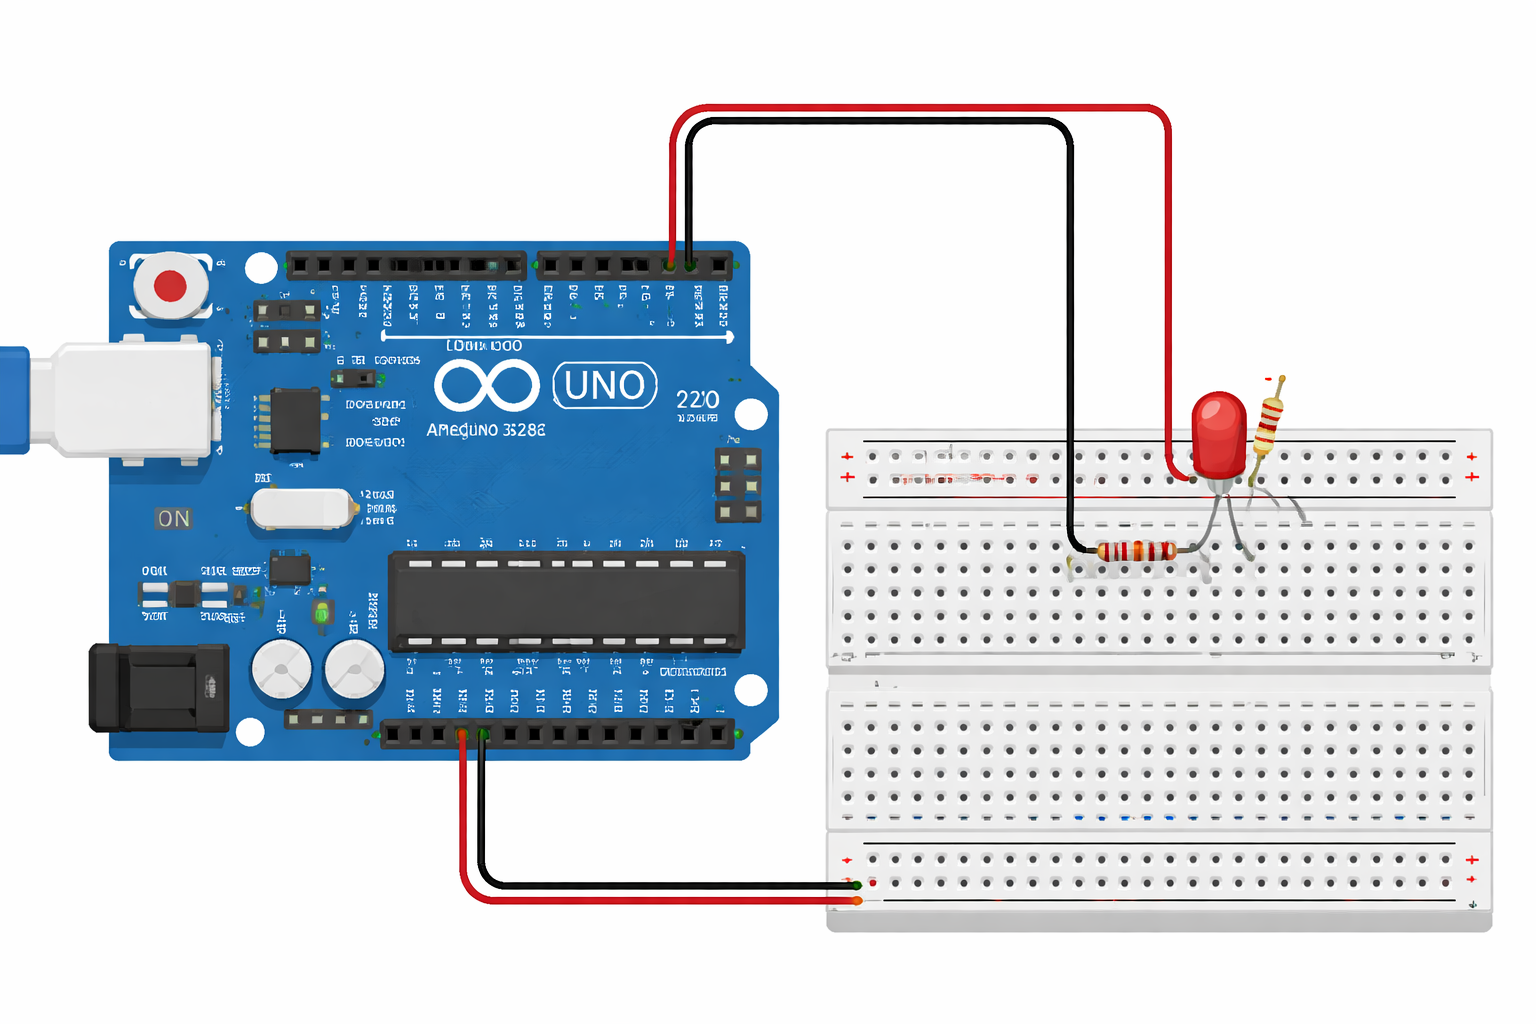
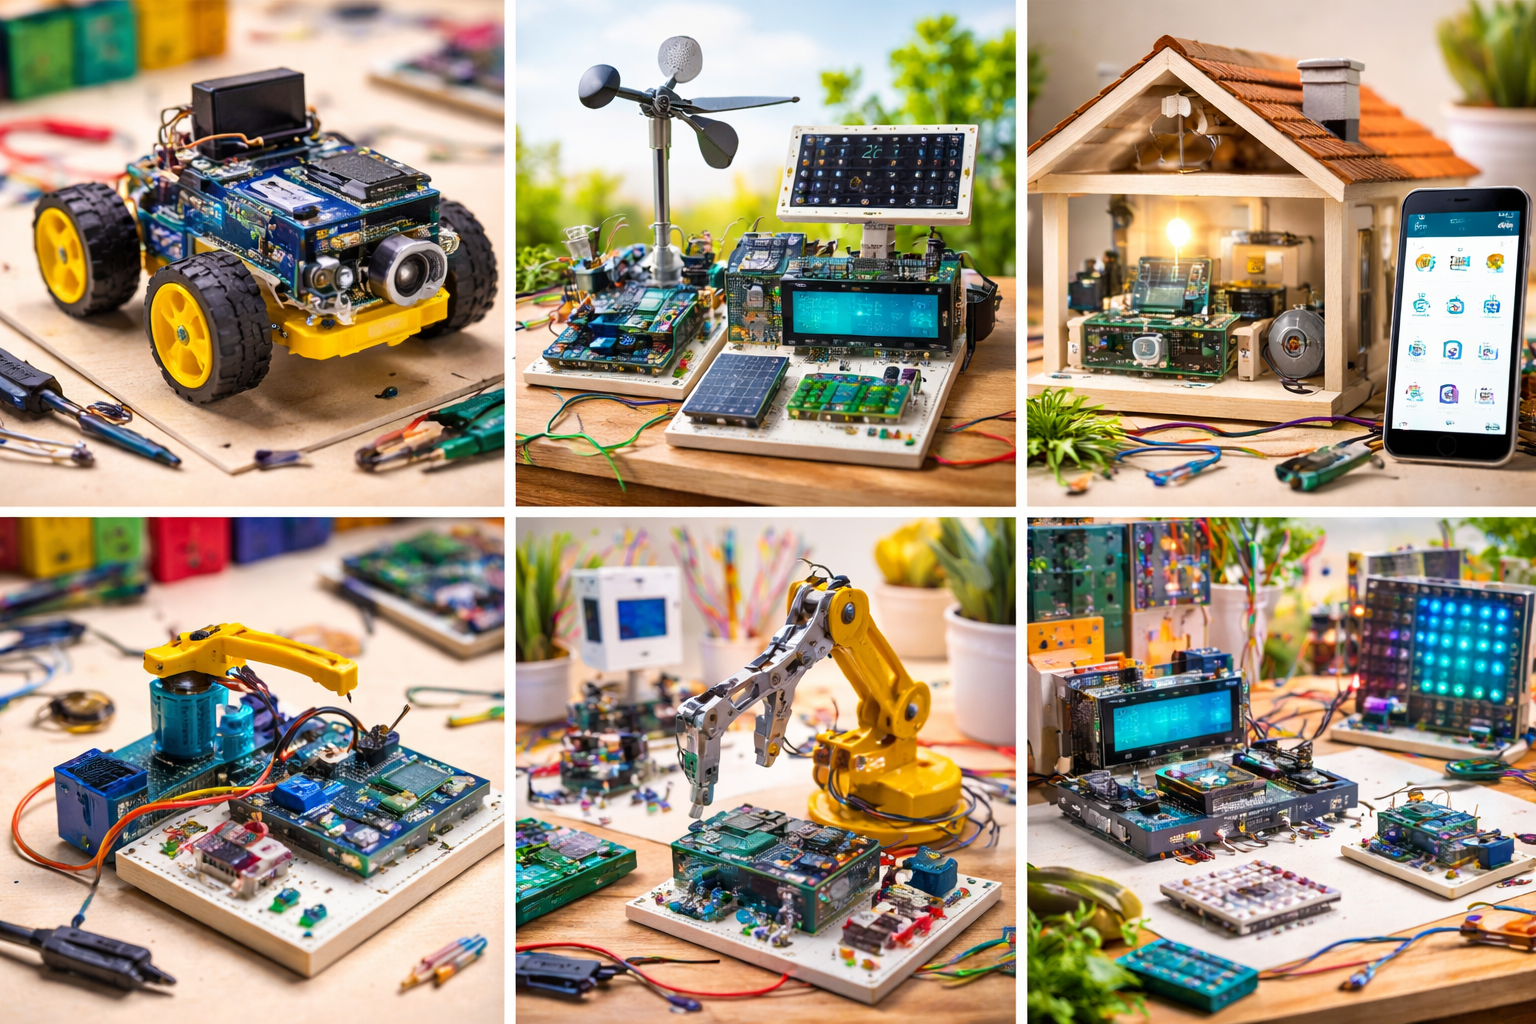
Arduino is an open-source electronics platform that lets beginners and experts alike build interactive projects. From blinking lights to robots, smart homes to weather stations, Arduino is the foundation for millions of maker projects worldwide.

Arduino Uno board overview

What's in this lesson: Hardware components, programming basics, your first circuit, and assessment.

Why this matters: Arduino skills open doors to robotics, IoT, automation, and physical computing careers.

Understanding Your Arduino Board

The Arduino Uno is the most popular board for beginners. It's built around the ATmega328P microcontroller and features 14 digital pins, 6 analog inputs, and multiple power options.

Arduino Uno board labeled diagram

USB Port

Connects to your computer for programming and power.

Digital Pins (0-13)

Read or write HIGH (5V) or LOW (0V) signals.

Analog Pins (A0-A5)

Read varying voltage levels (0-5V) as numbers (0-1023).

Power Jack

Optional external power supply (7-12V recommended).

Reset Button

Restarts your program from the beginning.

Built-in LED

Connected to pin 13, perfect for testing.

Each component plays a critical role in how Arduino interacts with sensors, motors, lights, and other electronics.

Knowledge Check 1

Which type of pin would you use to read a temperature sensor that outputs varying voltage?

Digital pin
Analog pin
Power pin
Reset pin

The Arduino IDE: Your Coding Environment

The Arduino Integrated Development Environment (IDE) is where you write, compile, and upload code to your board. It's free, cross-platform, and designed for simplicity.

Arduino IDE interface

Verify (Check)

Checks your code for errors without uploading.

Upload (->)

Compiles and transfers code to your Arduino.

Serial Monitor

Displays data sent from your Arduino to the computer.

Every Arduino program (called a "sketch") has two essential functions: setup() runs once at startup, and loop() runs repeatedly forever.

Anatomy of an Arduino Sketch

Arduino programs follow a simple structure. Understanding this foundation is key to building any project.

Arduino code structure flowchart
// Setup runs once when you press reset or power on void setup() { // Initialize pin 13 as an output pinMode(13, OUTPUT); } // Loop runs over and over again forever void loop() { digitalWrite(13, HIGH); // Turn LED on delay(1000); // Wait 1 second digitalWrite(13, LOW); // Turn LED off delay(1000); // Wait 1 second }

Key functions:

  • pinMode(pin, mode) - Configure pin as INPUT or OUTPUT
  • digitalWrite(pin, value) - Set digital pin HIGH or LOW
  • delay(milliseconds) - Pause execution for specified time

Knowledge Check 2

Which function runs repeatedly in an Arduino sketch?

setup()
loop()
main()
run()

Digital vs. Analog Signals

Understanding signal types is essential for working with sensors and actuators.

Digital signal diagram

Digital Signals

Only two states: HIGH (5V) or LOW (0V). Used for switches, LEDs, buttons.

Analog Signals

Continuous range from 0V to 5V. Arduino reads as values 0-1023. Used for sensors like temperature, light, sound.

digitalRead() returns HIGH or LOW. analogRead() returns a number between 0 and 1023, representing the voltage level.

Your First LED Circuit

Let's build the classic "Blink" project - the "Hello World" of Arduino. You'll connect an external LED and make it blink.

LED circuit with Arduino

Components needed:

  • Arduino Uno board
  • Breadboard
  • LED (any color)
  • 220-ohm resistor
  • Jumper wires

Steps: Connect LED's long leg (anode) to pin 13 through a resistor. Connect short leg (cathode) to GND. Upload the Blink sketch. Watch it glow!

Knowledge Check 3

Why do we use a resistor with an LED in Arduino circuits?

To make the LED brighter
To limit current and protect the LED from burning out
To change the LED color
Resistors are optional with LEDs

Essential Arduino Functions

Mastering these core functions will unlock most Arduino projects.

Arduino functions reference chart

pinMode(pin, mode)

Sets a pin as INPUT, OUTPUT, or INPUT_PULLUP.

digitalWrite(pin, value)

Writes HIGH or LOW to a digital pin.

digitalRead(pin)

Reads the state of a digital pin (HIGH or LOW).

analogRead(pin)

Reads analog voltage (0-1023) from analog pins.

analogWrite(pin, value)

Outputs PWM signal (0-255) on PWM-capable pins.

delay(ms)

Pauses program execution for specified milliseconds.

These functions form the building blocks for reading sensors, controlling motors, and creating interactive behaviors.

Debugging with Serial Monitor

The Serial Monitor is your window into what's happening inside your Arduino. It's essential for debugging and displaying sensor data.

Arduino Serial Monitor display
void setup() { Serial.begin(9600); // Start serial at 9600 baud Serial.println("Arduino Ready!"); } void loop() { int sensorValue = analogRead(A0); Serial.print("Sensor: "); Serial.println(sensorValue); delay(500); }

Serial.begin(baudRate) initializes serial communication. Common baud rates: 9600, 115200.

Serial.print() sends data without a newline. Serial.println() adds a newline after data.

Knowledge Check 4

What does Serial.begin(9600) do in your Arduino sketch?

Sets pin 9600 as an output
Initializes serial communication at 9600 bits per second
Waits for 9600 milliseconds
Reads data from serial port 9600

Beyond the Basics

You've learned the fundamentals! Here's where to go next on your Arduino journey:

Arduino project examples collage

Sensors

Explore temperature, distance, motion, and light sensors to gather data from the environment.

Actuators

Control servo motors, DC motors, and stepper motors to create movement.

Communication

Learn I2C, SPI, Bluetooth, and WiFi to connect multiple devices and create IoT projects.

Libraries

Use pre-written code libraries to simplify complex tasks like LCD displays and RFID readers.

The Arduino community shares millions of projects online. Explore Arduino Project Hub, Instructables, and GitHub for inspiration and code examples.

Key Takeaways

Let's review what you've learned about Arduino:

  • Arduino is an open-source electronics platform for building interactive projects with microcontrollers.
  • The Arduino Uno features 14 digital pins, 6 analog pins, and a USB connection for programming.
  • Every sketch has two main functions: setup() runs once, loop() runs continuously.
  • Digital pins read or write HIGH/LOW signals; analog pins read voltage levels as values 0-1023.
  • Core functions include pinMode(), digitalWrite(), digitalRead(), analogRead(), and delay().
  • The Serial Monitor is essential for debugging and displaying sensor data from your Arduino.
  • LEDs require resistors to limit current and prevent damage to the component.

Ready to Test Your Knowledge?

Final Assessment

You'll answer 8 questions covering everything you've learned.

You need 80% or higher to earn your certificate.

Take your time and think through each question carefully.

Click Next when you're ready to begin!

Assessment Question 1 of 8

What is the primary purpose of the Arduino platform?

Assessment Question 2 of 8

How many digital I/O pins does the Arduino Uno have?

Assessment Question 3 of 8

Which function runs only once when the Arduino starts?

Assessment Question 4 of 8

What range of values does analogRead() return?

Assessment Question 5 of 8

What does the pinMode() function do?

Assessment Question 6 of 8

If you want to turn on an LED connected to pin 7, which code would you use?

Assessment Question 7 of 8

What is the purpose of the delay() function?

Assessment Question 8 of 8

Which tool in the Arduino IDE allows you to view data sent from the Arduino to your computer?

Assessment Results